 how-to
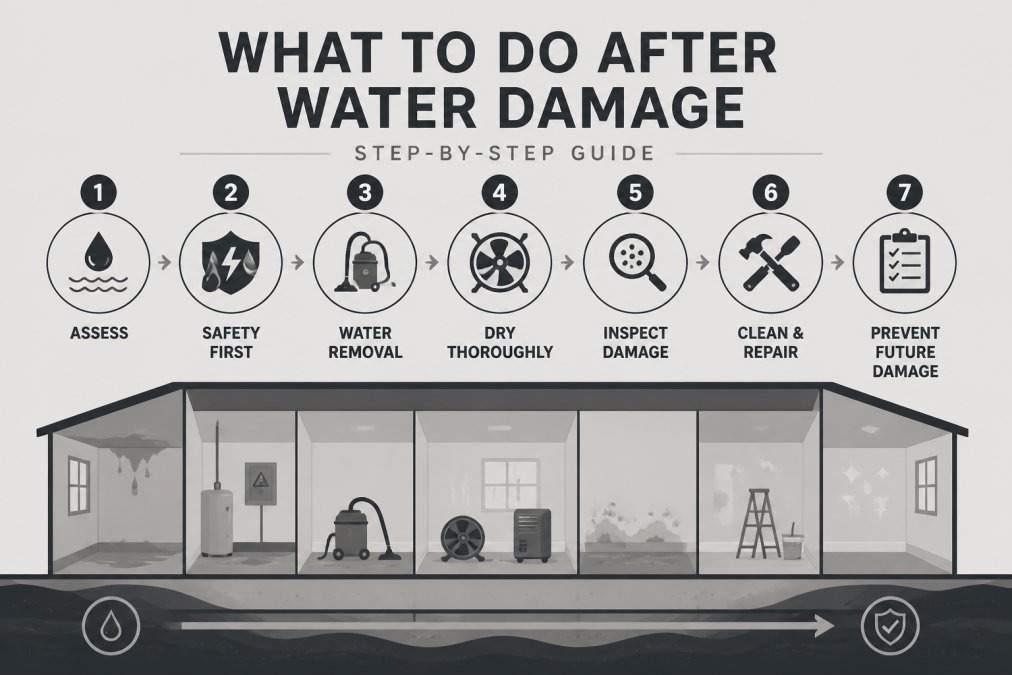
What to Do After Water Damage: Step-by-Step Guide
Table of Contents
- Step 1: Prioritize Safety Before Anything Else
- Step 2: Remove Standing Water and Begin Drying
- Signs of Hidden Water Damage You Should Not Ignore
- How to Document Water Damage for Insurance
- Water Damage Restoration Timeline: What to Expect
- Sanitization, Deodorization, and Post-Restoration Air Quality
- DIY vs. Professional Water Damage Restoration
- Frequently Asked Questions
Last Updated: August 30, 2026
Water damage is one of the most disruptive and financially damaging events a homeowner can face. At Times Square Remodeling Inc., we've worked with property owners navigating the aftermath of floods, burst pipes, and appliance failures, and the single biggest factor separating recoverable situations from catastrophic ones is how fast and how correctly you respond in the first hours. This guide from Times Square Remodeling Inc. walks you through every critical step, from immediate safety precautions to post-restoration air quality considerations, covering the angles most emergency checklists miss entirely.
The hard truth: most homeowners lose thousands of dollars not because of the water itself, but because of delayed action, improper drying, or insurance claim mistakes that were entirely preventable.
Step 1: Prioritize Safety Before Anything Else
The most dangerous mistake after water damage is treating it like a cleaning problem. It isn't. Before you touch anything, you need to assess the situation for life-safety hazards.
Structural instability, electrical shock, and contaminated water are all real, immediate risks. Ceiling bulges indicate trapped water that can collapse without warning. Flooring that feels soft or spongy underfoot may no longer be load-bearing. If you see any of these signs, exit the area immediately.
Understanding Water Categories and Health Hazards
Water damage is classified into three categories, and the category determines how dangerous your situation actually is.
Category 1 (Clean Water) originates from a sanitary source, a broken supply line, a malfunctioning appliance, or rainwater. It poses minimal immediate health risk, though it degrades quickly if left standing.
Category 2 (Grey Water) contains contaminants that can cause illness. Sources include dishwasher overflow, washing machine discharge, and toilet overflow with urine only. Direct skin contact should be avoided, and PPE (gloves, boots, and eye protection) is required for cleanup.
Category 3 (Black Water) is the most serious classification. Sewage backup, floodwater from rivers or storm drains, and standing water that has been present for more than 48 hours all fall into this category. Black water contains pathogens, bacteria, and potentially toxic compounds. Cleanup requires professional-grade PPE and, in most cases, professional remediation. Do not attempt Category 3 cleanup without proper training and equipment.
According to the CDC guidelines on floodwater safety, exposure to contaminated floodwater can cause serious gastrointestinal illness, wound infections, and respiratory issues.
Shut Off Water and Electricity
Locate your main water shut-off valve and close it immediately. For most homes, this is near the water meter, in a utility room, or along the exterior foundation wall. If the source is a specific appliance, shut off the supply valve behind it.
For electricity: if there is any standing water near electrical outlets, panels, or appliances, do not enter the area. Call your utility provider or a licensed electrician. Never attempt to shut off a breaker while standing in water.
Step 2: Remove Standing Water and Begin Drying
Speed matters more here than almost anywhere else in the restoration process. Mold growth can begin within 24 to 48 hours of water exposure. Structural materials absorb moisture rapidly, and the longer water sits, the deeper it penetrates into subfloor, drywall, and insulation.
Wet Vacuums, Air Movers, and Dehumidification
Once safety is confirmed, begin water extraction. A wet vacuum handles smaller volumes effectively. For larger areas, professional-grade water extractors are significantly more efficient and worth renting if the affected area exceeds a single room.
After extraction, the drying phase begins. This is where most DIY attempts fall short. Structural drying requires:
- Air movers positioned to create high-velocity airflow across wet surfaces
- Dehumidification to pull moisture from the air and prevent re-absorption into building materials
- Adequate ventilation, open windows and doors when outdoor humidity is lower than indoor levels
A hygrometer (a moisture meter for air humidity) helps you track progress. Target indoor relative humidity below 50% during the drying process. Without this tool, you are guessing.
Structural Drying: Subfloor, Drywall, and Insulation
Surface drying is the easy part. The hard part is the materials you cannot see.
Subfloor panels absorb water aggressively, especially OSB (oriented strand board). Drywall wicks moisture upward through capillary action, often reaching areas well above the visible waterline. Insulation, once saturated, loses most of its thermal value and rarely dries effectively, in most cases, it needs to be removed and replaced.
Moisture detection with a pin-type or pinless moisture meter is essential. Probe multiple points across the affected area to build a moisture map. Professional restorers call this moisture mapping, and it determines where drying equipment is positioned and how long the process runs.
Signs of Hidden Water Damage You Should Not Ignore
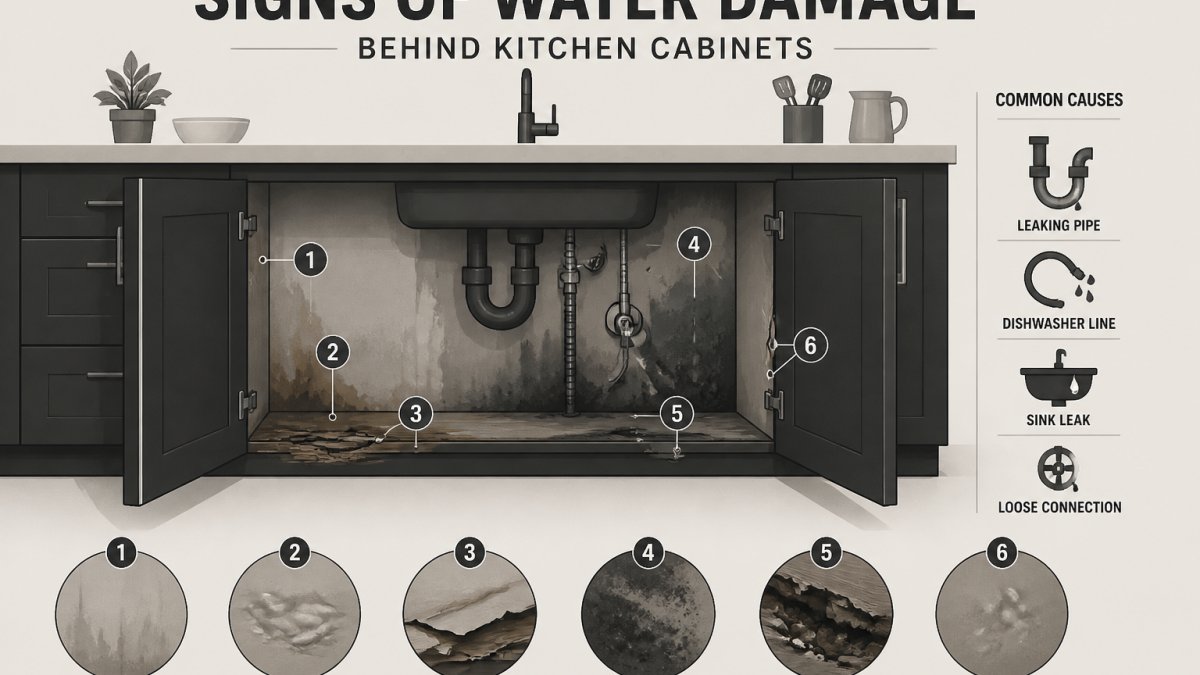
Signs of hidden water damage include warped flooring, peeling paint or wallpaper, musty odors, visible mold growth, and staining on ceilings or walls. These indicators often appear days or weeks after the initial event, when surface materials have dried but structural components remain saturated.
Pay particular attention to:
- Soft spots in flooring, indicates subfloor deterioration
- Buckling hardwood planks, moisture-driven expansion that rarely reverses without replacement
- Efflorescence on concrete or masonry, white mineral deposits left by evaporating water, signaling ongoing moisture intrusion
- Discoloration on ceiling drywall, even a small stain can indicate a significant volume of trapped water above
A common mistake is treating the visible symptoms without locating the source. Paint over a water stain without fixing the underlying moisture problem, and you will be repainting again within months.
How to Document Water Damage for Insurance
Thorough documentation is the foundation of a successful insurance claim. Start photographing and videoing before you remove anything. Capture every affected room from multiple angles, close-up shots of damaged materials, and the source of the water intrusion.
The Insurance Information Institute's guidance on filing claims recommends creating a detailed written inventory of damaged items, including approximate age, original cost, and replacement value for each.
Document the following specifically:
- Date and time the damage was discovered
- The apparent source of water
- All affected rooms and materials (flooring type, wall finishes, cabinetry)
- Damaged personal property (furniture, electronics, appliances)
- Any emergency actions you took, including water extraction and drying equipment used
Insurance Claim Denial Prevention
This is where the water damage restoration timeline intersects directly with your financial recovery. Many claims are denied or reduced not because the damage isn't covered, but because of documentation gaps or policyholder errors.
The most common denial triggers:
- Delayed reporting, most policies require prompt notification. Report the loss to your insurer as soon as possible, ideally within 24 hours.
- Failure to mitigate, your policy likely includes a duty to mitigate damages. If you did nothing to stop ongoing water intrusion or remove standing water, the insurer may reduce your claim.
- Pre-existing damage confusion, without clear documentation of the pre-loss condition, insurers may attribute new damage to deferred maintenance.
- Missing receipts or records, keep a home inventory updated annually. A claims adjuster cannot value what you cannot prove existed.
Water Damage Restoration Timeline: What to Expect
The water damage restoration timeline varies based on the severity of the event, the category of water involved, and how quickly the response begins. Here is a realistic framework for a mid-severity residential event:
| Phase | Timeframe | Key Activities |
|---|---|---|
| Emergency response | Hours 0-2 | Safety assessment, water shut-off, electricity isolation |
| Water extraction | Hours 2-24 | Wet vacuum or extractor, initial documentation, insurer notification |
| Structural drying | Days 1-3 | Air movers, dehumidifiers, moisture mapping |
| Mold prevention monitoring | Days 3-7 | Daily moisture readings, equipment adjustment, HVAC inspection |
| Sanitization and deodorization | Days 7-14 | Antimicrobial treatment, odor neutralization |
| Repairs and restoration | Day 14 onward | Drywall replacement, flooring, painting, rebuilding |
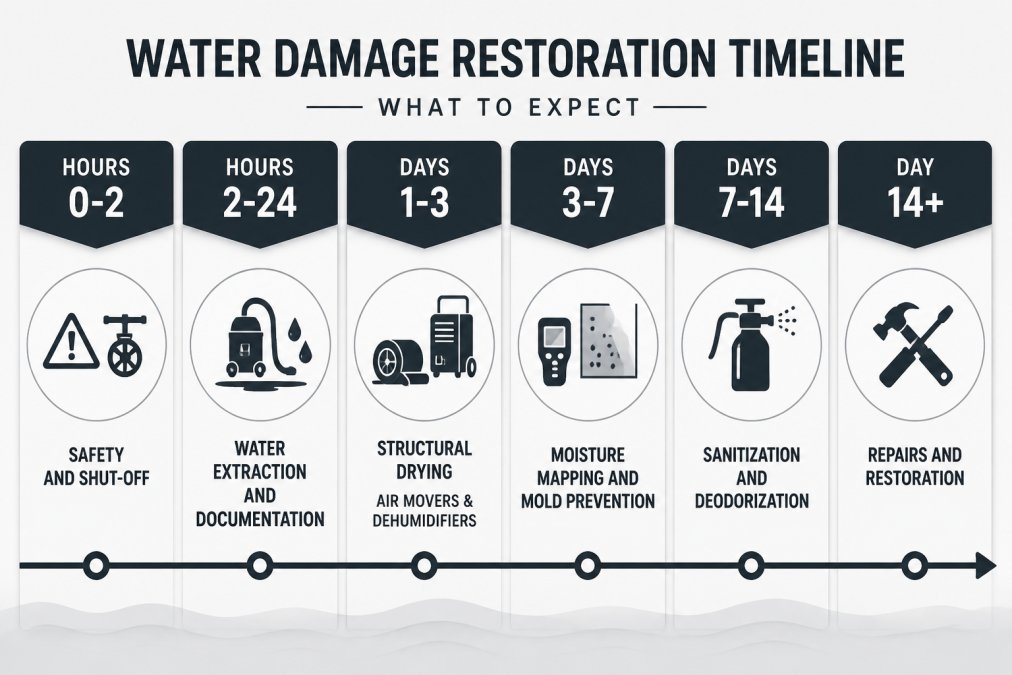
Mold remediation, if required, adds time. Significant structural repairs, subfloor replacement, drywall reconstruction, insulation removal, extend the timeline further. A realistic expectation for a serious water damage event is three to six weeks from incident to completed restoration.
Sanitization, Deodorization, and Post-Restoration Air Quality
Sanitization is not optional, particularly for Category 2 or Category 3 water damage events. Once structural drying is complete, all affected surfaces should be treated with an EPA-registered antimicrobial solution. This step addresses contamination that is not visible to the naked eye.
Deodorization follows sanitization. Musty odors after water damage are caused by microbial growth and decomposing organic material. Masking agents (air fresheners, scented sprays) do not solve this, they conceal it temporarily. Effective deodorization uses hydroxyl generators or ozone treatment to neutralize odor molecules at the source.
Post-restoration air quality testing is the step most guides skip entirely. According to the EPA's guide to mold and moisture in buildings, elevated indoor mold spore counts can persist even after visible mold has been remediated. Air quality testing by an independent industrial hygienist confirms that spore counts are within acceptable levels before the space is reoccupied.
This matters most for households with children, elderly occupants, or anyone with respiratory conditions. An HVAC inspection is also warranted after any significant water damage event, ductwork can harbor mold and distribute spores throughout the entire home if contaminated.
DIY vs. Professional Water Damage Restoration
The DIY-versus-professional threshold is not about skill level. It is about the category of water, the scope of structural involvement, and whether an insurance claim is involved.
| Factor | DIY Appropriate | Professional Required |
|---|---|---|
| Water category | Category 1 only | Category 2 or 3 |
| Affected area | Under 10 sq ft | Over 10 sq ft |
| Structural involvement | None | Subfloor, drywall, or insulation affected |
| Mold presence | None visible | Any visible mold growth |
| Insurance claim | No claim involved | Claim filed with insurer |
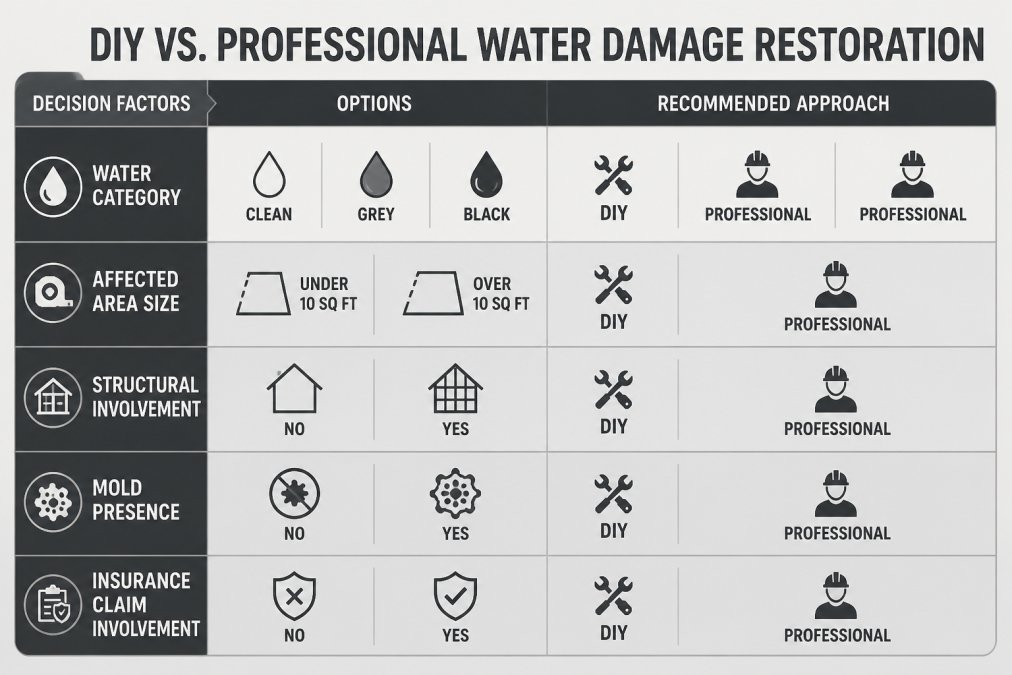
A small clean-water spill from a supply line, caught immediately, with no structural penetration? A competent homeowner can handle that. A sewage backup, a flooded basement, or any situation where the water has been sitting for more than 24 hours? That requires licensed professionals with moisture detection equipment, industrial drying systems, and the documentation protocols that insurance companies expect.
What most DIY guides miss is the liability dimension. If you handle remediation yourself and the insurer later discovers mold in a wall cavity, they may argue that improper remediation caused secondary damage, and deny coverage for it. Professional restorers provide documentation that protects your claim.
The IICRC S500 Standard for Professional Water Damage Restoration establishes the industry benchmark for professional restoration work, including documentation, drying protocols, and contamination classification. When hiring a restoration contractor, verify they follow this standard.
Water damage rarely stays simple. What starts as a burst pipe can become a mold remediation project, a structural repair, and an insurance dispute, all at once. Times Square Remodeling Inc. brings over 15 years of licensed contracting experience to exactly these situations, with the expertise to assess structural damage, coordinate restoration work, and help homeowners navigate the rebuild process from extraction to finished repairs. If your home has suffered water damage and you need a licensed general contractor to assess the scope and manage the restoration, contact Times Square Remodeling Inc. to get started.
Frequently Asked Questions
Q: What is the first thing to do when you discover water damage?
A: Stop the water source immediately. Turn off the main water supply valve if a pipe burst or appliance caused the flood, then cut power to any affected rooms at the breaker panel. Once those two hazards are controlled, put on PPE, gloves, rubber boots, and a mask, before entering the space. Photograph everything before moving a single item. Those first photos are the foundation of your insurance claim and should capture the water source, standing water depth, and all affected surfaces.
Q: How quickly does mold grow after water damage occurs?
A: Mold can begin developing within 24 to 48 hours of water exposure, especially in warm, humid conditions. Porous materials like drywall, insulation, and subfloor wood are particularly vulnerable. Reducing indoor humidity below 50% with dehumidifiers and air movers is the most effective way to slow mold growth. If structural drying is not completed within 48 to 72 hours, mold remediation often becomes a separate, more expensive step in the overall water damage restoration process.
Q: Does homeowners insurance cover water damage restoration?
A: Most standard homeowners insurance policies cover sudden and accidental water damage, such as a burst pipe or appliance failure, but exclude gradual leaks and flood damage. Flood damage typically requires a separate flood insurance policy through the National Flood Insurance Program (NFIP). To avoid claim denial, document the damage thoroughly before any cleanup, notify your carrier promptly, and avoid making permanent repairs until a claims adjuster has completed the property assessment. Keep all receipts for emergency mitigation costs.
Q: How can you tell if water damage is structural?
A: Structural water damage shows up as sagging or buckled floors, cracks running along load-bearing walls, doors and windows that no longer close properly, and soft or spongy subfloor sections when you walk across them. A hygrometer can detect elevated moisture levels inside walls before visible damage appears. If moisture mapping reveals saturation in framing, joists, or the subfloor, a licensed contractor should assess whether the structural integrity has been compromised before restoration work begins.
This article was written using GrandRanker