 how-to
Energy Saving HVAC Installation Tips for Homeowners
Table of Contents
- Why HVAC Installation Quality Determines Your Energy Bills
- Start With an HVAC System Sizing Guide, Not Guesswork
- The Benefits of Proper Ductwork Sealing Are Immediate
- Smart Thermostat Installation Best Practices for Maximum Savings
- Step-by-Step Energy Saving HVAC Installation Tips
- What to Avoid: Common Installation Mistakes That Waste Energy
- Final Checklist Before You Turn On Your New System
- Frequently Asked Questions
Last Updated: September 6, 2026
Why HVAC Installation Quality Determines Your Energy Bills
The single biggest factor in your home's energy consumption isn't the efficiency rating stamped on the outdoor unit; it is the quality of the installation itself. A system installed with sloppy practices can waste a substantial portion of its energy through poor airflow, improper refrigerant charge, and leaky ductwork. This guide from Times Square Remodeling Inc. covers the energy saving hvac installation tips that separate a system that performs to spec from one that quietly inflates your utility bills for the next fifteen years.
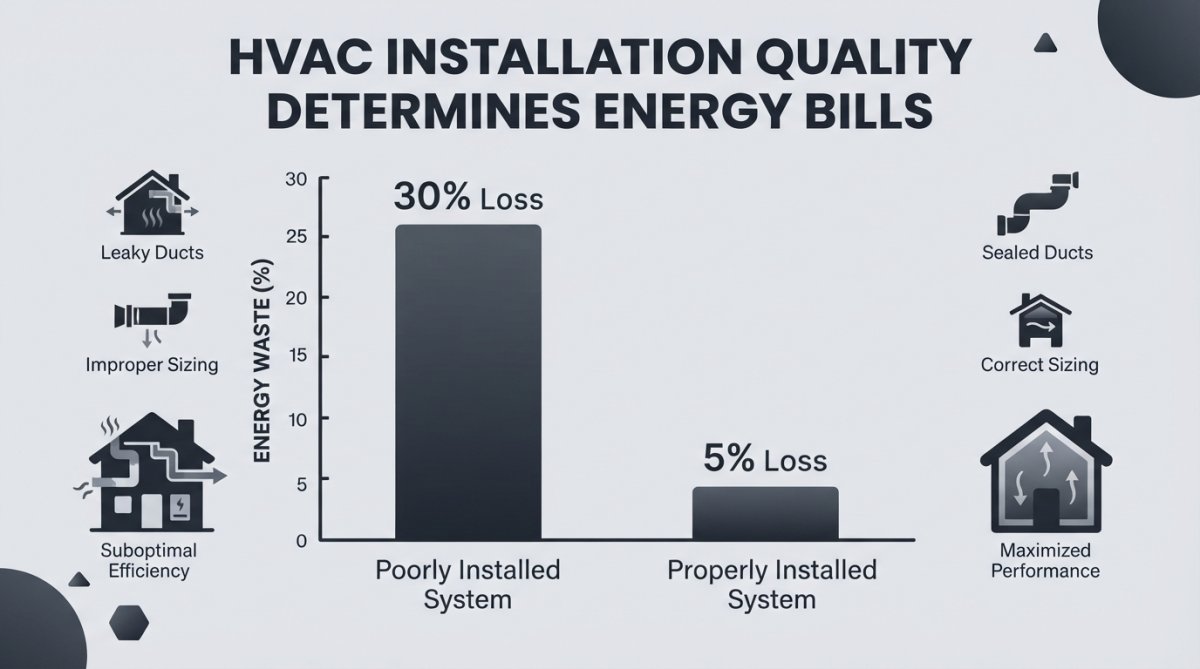
Most homeowners focus on the brand name or the SEER2 number when buying a new system. In practice, the installation quality determines whether you ever realize that rated efficiency. According to guidance from the U.S. Department of Energy on central air conditioning, improper installation and maintenance can reduce efficiency by as much as 30 percent in some cases. That means a system rated at 16 SEER2 could perform closer to an 11 SEER2 unit if the installation is flawed.
Below, we'll walk through the exact steps and checks that ensure your new system actually delivers the efficiency you paid for.
Start With an HVAC System Sizing Guide, Not Guesswork
The most common installation error is also the most expensive: installing an oversized system. Many contractors assume bigger is better, but an oversized unit short-cycles, meaning it turns on and off frequently without running long enough to dehumidify your home properly.
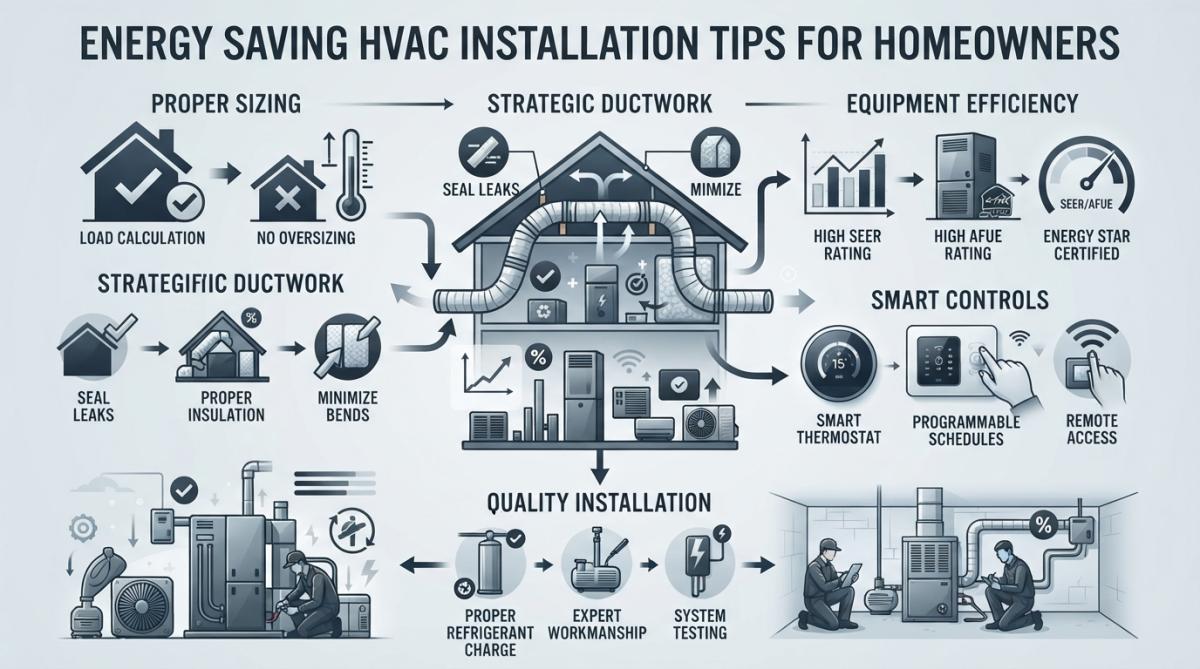
Proper sizing requires a HVAC system sizing guide based on a Manual J load calculation. This industry-standard method accounts for your home's square footage, window orientation, insulation levels, air leakage, and local climate data. A unit that is correctly sized runs longer cycles, maintains steadier temperatures, and consumes less energy overall.
Skipping the load calculation is a false economy. An oversized system costs more upfront and wastes energy for its entire service life. If a contractor quotes you a price without performing a room-by-room load calculation, that is a red flag. The calculation is the foundation every other energy saving decision builds on.
The Benefits of Proper Ductwork Sealing Are Immediate
Your ductwork is the delivery network for conditioned air, and leaks undermine everything the system does. The benefits of proper ductwork sealing are immediate and measurable: better airflow to each room, fewer hot and cold spots, and lower energy consumption.
In many homes, ducts leak at the joints where sections connect. Sealing these joints with duct mastic, not standard duct tape, prevents conditioned air from escaping into attics or crawl spaces. Foil tape has a place for certain connections, but mastic is the durable choice for permanent sealing.
Leaky ducts force your system to work harder to maintain the thermostat setting. This increases energy consumption and shortens equipment life. Sealing visible duct runs and insulating any ducts that pass through unconditioned spaces like attics should be part of every installation project. A pressure test after sealing confirms the ductwork holds air properly before the system goes into regular service.
Smart Thermostat Installation Best Practices for Maximum Savings
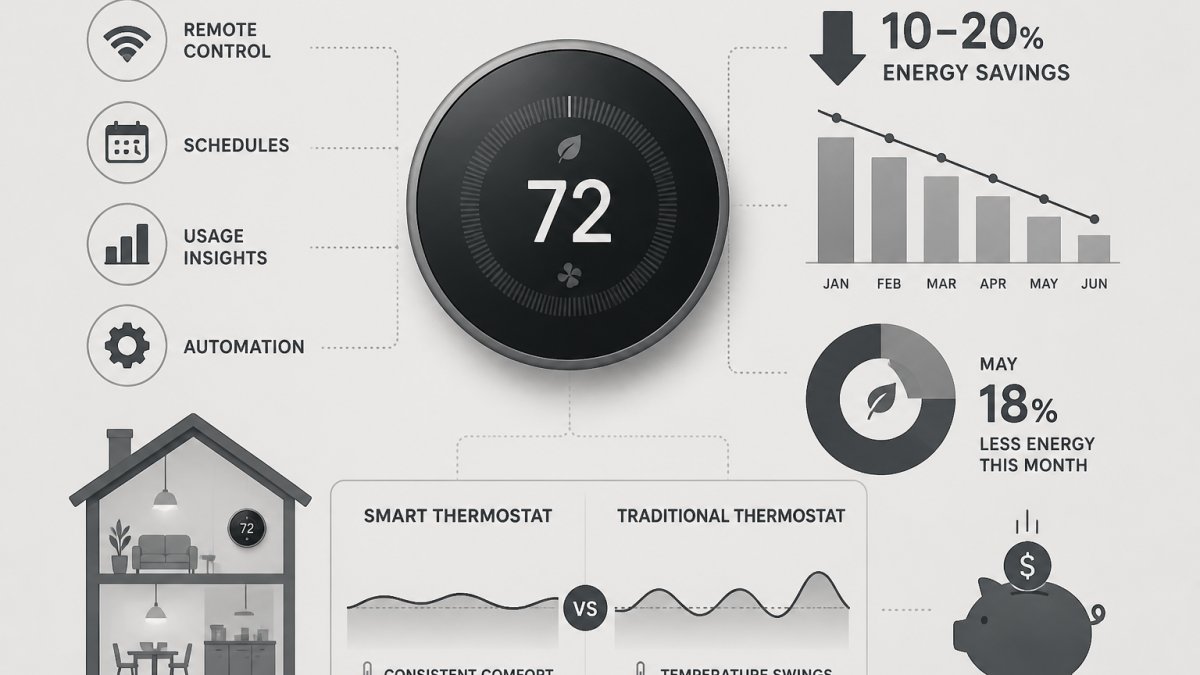
A smart thermostat is one of the most cost-effective efficiency upgrades you can pair with a new HVAC system, but only if installed correctly. Smart thermostat installation best practices start with proper placement: the thermostat must be on an interior wall away from direct sunlight, drafts, and heat-producing appliances.
The thermostat's wiring must match your system's configuration, including the common wire, or C-wire, that powers the device continuously. Many older homes lack a C-wire, which requires either running a new wire or using an adapter kit. Skipping this step leads to a thermostat that loses power or fails to maintain your schedule.
Programmable controls are where the savings accumulate. Set the thermostat to raise temperatures when the home is empty and lower them before you return. The ENERGY STAR thermostat guidance suggests that programming temperature setbacks of 7 to 10 degrees Fahrenheit for eight hours a day can reduce heating and cooling energy use noticeably. The smart thermostat makes this automatic, removing the need to remember manual adjustments.
Step-by-Step Energy Saving HVAC Installation Tips
The following steps represent the core of what a quality installation should include. Each one directly affects how efficiently your system operates. This is the point where a merely functional installation diverges from one that delivers peak efficiency. The difference is in the verification and the data.
- Verify the refrigerant charge by subcooling and superheat, not just pressure. An incorrect charge reduces cooling capacity and increases energy consumption. A technician should calculate subcooling for a fixed-orifice system or superheat for a TXV (thermostatic expansion valve) system, comparing readings against the manufacturer's charging chart. Simply adding refrigerant until the pressure 'looks right' is a common error that leaves the system overcharged, which can lead to compressor failure and a significant drop in efficiency.
- Set the airflow to the manufacturer's specified CFM (cubic feet per minute) per ton. The blower speed must match the ductwork design and the equipment's requirements. Too much airflow causes noise and poor dehumidification, and it can carry moisture off the evaporator coil and into the ductwork. Too little airflow causes the coil to freeze or overheat, leading to a system that short-cycles and wastes energy. The technician should measure temperature rise across the heat exchanger in heating mode and temperature drop across the evaporator coil in cooling mode to confirm the airflow is within the specified range.
- Seal all duct connections with mastic, not just foil tape. Apply a liberal coat of mastic to every joint in the supply and return runs before insulating. For connections that may need to be disassembled for future service, use a mastic-coated gasket or a quality foil tape that is UL-181 listed. A pressure test, or duct leakage test, after sealing confirms the ductwork holds air properly before the system goes into regular service. A common target is less than 10% total duct leakage for new installations.
- Install the thermostat on an interior wall and confirm the C-wire is present. The C-wire, or common wire, provides a continuous 24-volt power supply to the thermostat. Without it, many smart thermostats will cycle the heating or cooling system to 'steal' power, which can cause short-cycling and inefficiency. Confirm the device is level and away from heat sources, direct sunlight, and drafts, which can cause it to read the room temperature inaccurately and run the system longer than necessary.
- Check the condensate drain with a water test. A clogged drain line can trigger a safety float switch that shuts the system down. The technician should pour water into the condensate pan to verify it flows freely through the drain line to the outside. A blocked drain can also cause water to back up into the equipment, leading to indoor air quality problems and component damage.
- Test static pressure to diagnose ductwork issues. High static pressure indicates undersized ducts, a restricted filter, or closed dampers, all of which force the blower to work harder and consume more electricity. The technician should measure total external static pressure (TESP) and compare it to the maximum allowable static pressure listed on the equipment's nameplate. A high reading means the duct system is the problem, not the equipment, and it must be addressed for the new system to perform efficiently.
- Commission the system with a full performance test. This is the final, non-negotiable step. Run a full heating and cooling cycle and verify the following: supply and return air temperatures, refrigerant pressures and temperatures, gas manifold pressure (for furnaces), temperature rise, and total static pressure. Record these readings on the installation invoice. This data confirms the system operates within manufacturer tolerances and provides a baseline for future maintenance. If a contractor cannot or will not provide these readings, it is a sign that the installation is not complete.
What to Avoid: Common Installation Mistakes That Waste Energy
Several recurring mistakes undermine efficiency, and knowing them helps you hold your contractor accountable. The first is ignoring the load calculation, which we covered above. The second is failing to address the thermal envelope before installing new equipment.
Your home's insulation and air sealing determine how much conditioned air the system must produce. Installing high-efficiency equipment in a leaky home is like filling a bathtub with the drain open. Weatherization measures, including sealing air leaks around windows and doors and upgrading attic insulation, should precede or accompany the HVAC installation.
Beyond these, there are two critical mistakes that are becoming more common as new federal standards take effect:
Mistake 1: Mismatching the Outdoor and Indoor Units. As of January 1, 2023, the Department of Energy's new efficiency standards went into effect, requiring all new systems to be rated with SEER2 and HSPF2 (energy.gov). A major installation error is pairing a new, high-efficiency outdoor condensing unit with an older, mismatched indoor evaporator coil. This is often done to save money, but it can void the equipment warranty and result in the system never achieving its rated SEER2 efficiency. The efficiency rating is only valid when the entire system, outdoor unit, indoor coil, and furnace or air handler, is matched and listed as a combination by the manufacturer. Always confirm with your contractor that the indoor and outdoor units are an AHRI (Air-Conditioning, Heating, and Refrigeration Institute) matched system.
Mistake 2: Ignoring the Refrigerant Line Set. When replacing a system, many contractors reuse the existing refrigerant line set (the copper lines running between the outdoor and indoor units) without checking its size. If the new system uses a different refrigerant, like R-410A, and the line set is the wrong diameter or has kinks, it will cause pressure drops that reduce efficiency and can damage the new compressor. The line set must be flushed, inspected for kinks or restrictions, and verified to be the correct size for the new system's specifications. A line set that is too long or too small can also cause oil return issues that shorten the compressor's lifespan.
Finally, avoid contractors who skip the commissioning process. Post-installation commissioning verifies that the system operates within manufacturer tolerances, catching problems while they are still easy to fix. A contractor who is unwilling to provide you with a commissioning report is not performing a complete installation.
Final Checklist Before You Turn On Your New System
Before you accept the job and make the final payment, walk through this checklist with your contractor. Confirm the Manual J load calculation was performed and the equipment matches its results. Verify that all duct joints are sealed with mastic and that ducts in unconditioned spaces are insulated.
Check that the thermostat is correctly placed and wired, with the C-wire connected. Ask to see the recorded refrigerant pressures and static pressure readings. Confirm the system completed a full test cycle, including both heating and cooling modes where applicable.
A quality installation is an investment in your home's comfort and your monthly budget. The energy saving hvac installation tips above represent the difference between a system that operates at its rated efficiency and one that wastes energy for years. For homeowners in Los Angeles County planning a new system or an energy-efficient upgrade, Times Square Remodeling Inc. brings over 15 years of experience as a California-licensed general contractor to every project, ensuring professional execution from load calculation through final commissioning.
Frequently Asked Questions
What is the most important energy saving HVAC installation tip?
The single most important tip is to have a load calculation performed before any equipment is selected. This determines the correct size for your home. An oversized unit will short-cycle, wasting energy and failing to dehumidify properly. An undersized unit will run constantly, driving up your energy consumption. A professional HVAC system sizing guide accounts for your home's square footage, insulation levels, window types, and climate zone.
How does proper ductwork sealing impact HVAC efficiency?
In a typical home, ducts can lose up to 30% of conditioned air through leaks and poor connections. This means your system works harder to maintain the temperature you set, increasing energy consumption. Sealing ducts with mastic or foil tape, rather than standard duct tape, ensures the air you pay to heat or cool actually reaches your living spaces. This is a core benefit of proper ductwork sealing and a key part of any efficient installation.
What are the smart thermostat installation best practices?
First, ensure your HVAC system is compatible with the thermostat's voltage and wiring. Always turn off power at the breaker before handling wires. Label each wire with its corresponding terminal (R, W, Y, G) before disconnecting the old unit. Install the new thermostat on an interior wall away from direct sunlight, drafts, and heat sources to get accurate temperature readings. Finally, configure the settings for your schedule to maximize energy savings.
Does the size of an HVAC unit affect its energy consumption?
Yes, significantly. Both oversized and undersized units waste energy. An oversized system cools a room quickly but short-cycles, which prevents it from running long enough to remove humidity and reach peak efficiency. This frequent starting and stopping consumes more electricity. An undersized system runs almost continuously, struggling to reach the set temperature and causing wear and tear. A proper load calculation is essential to avoid these issues.
Upgrading your HVAC system is a significant investment, and the installation quality determines how quickly it pays you back through lower energy bills. Times Square Remodeling Inc. specializes in energy-efficient home upgrades, combining expert craftsmanship with a full-service approach that covers everything from ductwork to smart thermostats. Get started with Times Square Remodeling Inc. and ensure your new system performs at its best for years to come.